Indicators
This article explains how to add, edit and delete (custom) indicators in Desktop JForex3.
Adding an Indicator
Indicators can be added to the chart by using the chart icon or the Navigator (lower left).
Chart
To add an indicator by using the chart icon:
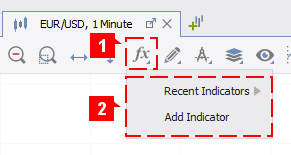
- Click on the indicator icon (1) above the chart.
- Click on Add Indicator (2) to open the Add indicator window. Recent Indicators lists indicators that were recently used in the workspace.
Navigator
To add an indicator by using the Navigator:
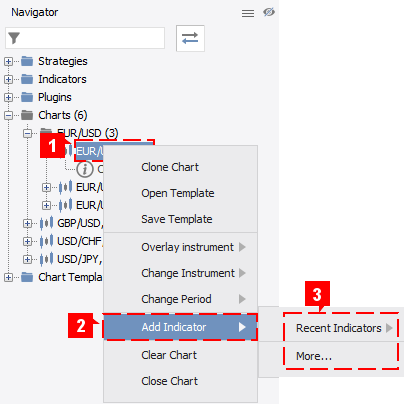
- In the Chart section of the Navigator, right-click the chart (1) where you would like to add an indicator
- Put the cursor on Add Indicator (2) .
- Click on More... (3) to open the Add indicator window. Recent Indicators lists indicators that were recently used in the workspace.
Add Indicator Window
The Add Indicator window shows all indicators that are available.
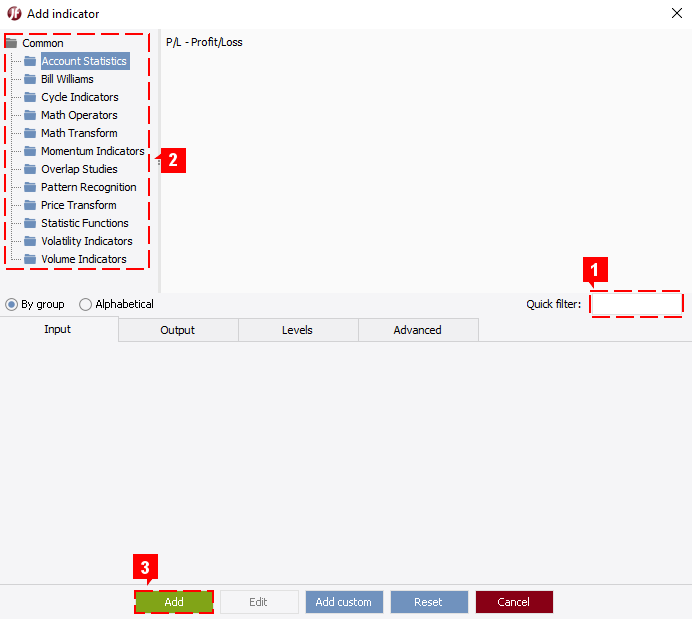
To add an indicator:
- Type the indicator name in the Quick Filter field (1) or go through the categories (2) to find the indicator.
- Once an indicator is selected, you can adjust its parameters.
- Click on Add (3) to add the indicator to the active chart.
The Edit button is available only for custom indicators and opens the source code in the strategy editor.
Editing/Deleting an Indicator
Indicators can be managed on the chart or by using the Navigator.
Chart
There are two types of indicators. One is displayed on the chart (such as moving average) while others are displayed at the bottom of the chart.
Indicator displayed on the chart
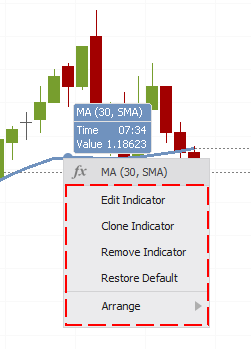
- Point the courser on the indicator and right-click.
- In the menu, click on Edit Indicator to adjust the indicator parameters or on Remove Indicator to delete it.
Indicator displayed at the chart bottom
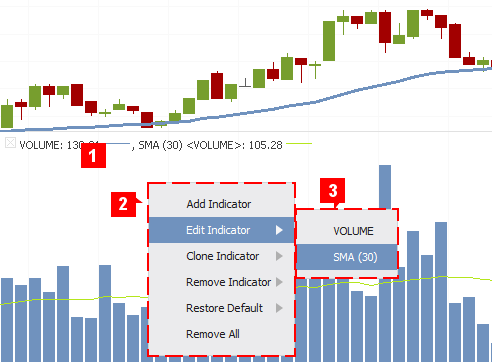
- Right-click (1) anywhere in the indicator area below the chart.
- The menu (2) provides options to edit the indicator parameters or to remove it. If several indicators are displayed in the area, select the indicator on which you would like to perform the action (3) .
Navigator
All graphical items (including indicators) that are on your chart are listed in the navigator.
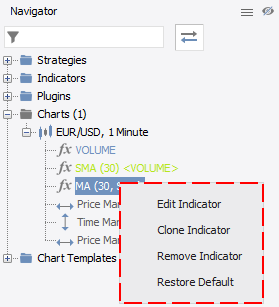
- Right-click the indicator in the Navigator.
- In the menu, click on Edit Indicator to adjust its parameters or on Remove Indicator to delete it from the chart.
Adding a Custom Indicator
This section explains how to add an existing custom indicator.
If you are interested in programming an indicator yourself, see here.
Chart
This one works only for already compiled indicators (file extension .jfx).
- Open the Add Indicator window.
- Click on Add Custom which opens the file dialog. You can add indicators which are stored locally on your computer or from JCloud.
- Select the indicator you would like to add and click OK (you can add only .jfx files).
- If you chose an indicator from JCloud, you will be asked to save file on your local drive. Specify the location and click on Save
- The Custom folder appears now in the Add indicator window. Select your indicator.
- Adjust its parameters and click on Add.
Navigator
This one works for both compiled (file extension .jfx) and uncompiled indicators (file extension .java)
- Right-click on Indicators in the Navigator.
- In the menu, click on Open Indicators which opens the file dialog. You can add indicators which are stored locally on your computer or from JCloud.
- Select the indicator you would like to add and click OK. Remember the file extension for later. If it is .jfx, the indicator is already compiled. If the file extension is .java, the indicator still needs to be compiled.
- If you chose an indicator from JCloud, you will be asked to save file on your local drive. Specify the location and click on Save.
- The indicator is now listed under Custom.
- If the indicator is already compiled, you can proceed and use it as any other built-in indicator. Drag&drop it to the chart or right-click the indicator and and click on Add to Active Chart.
- If the indicator is not compiled, right-click the indicator and click on Compile. If the compilation was successful (see Message tab), the indicator is ready for use.